CamMatch™ Professional
Professional Camera Matching for Blender
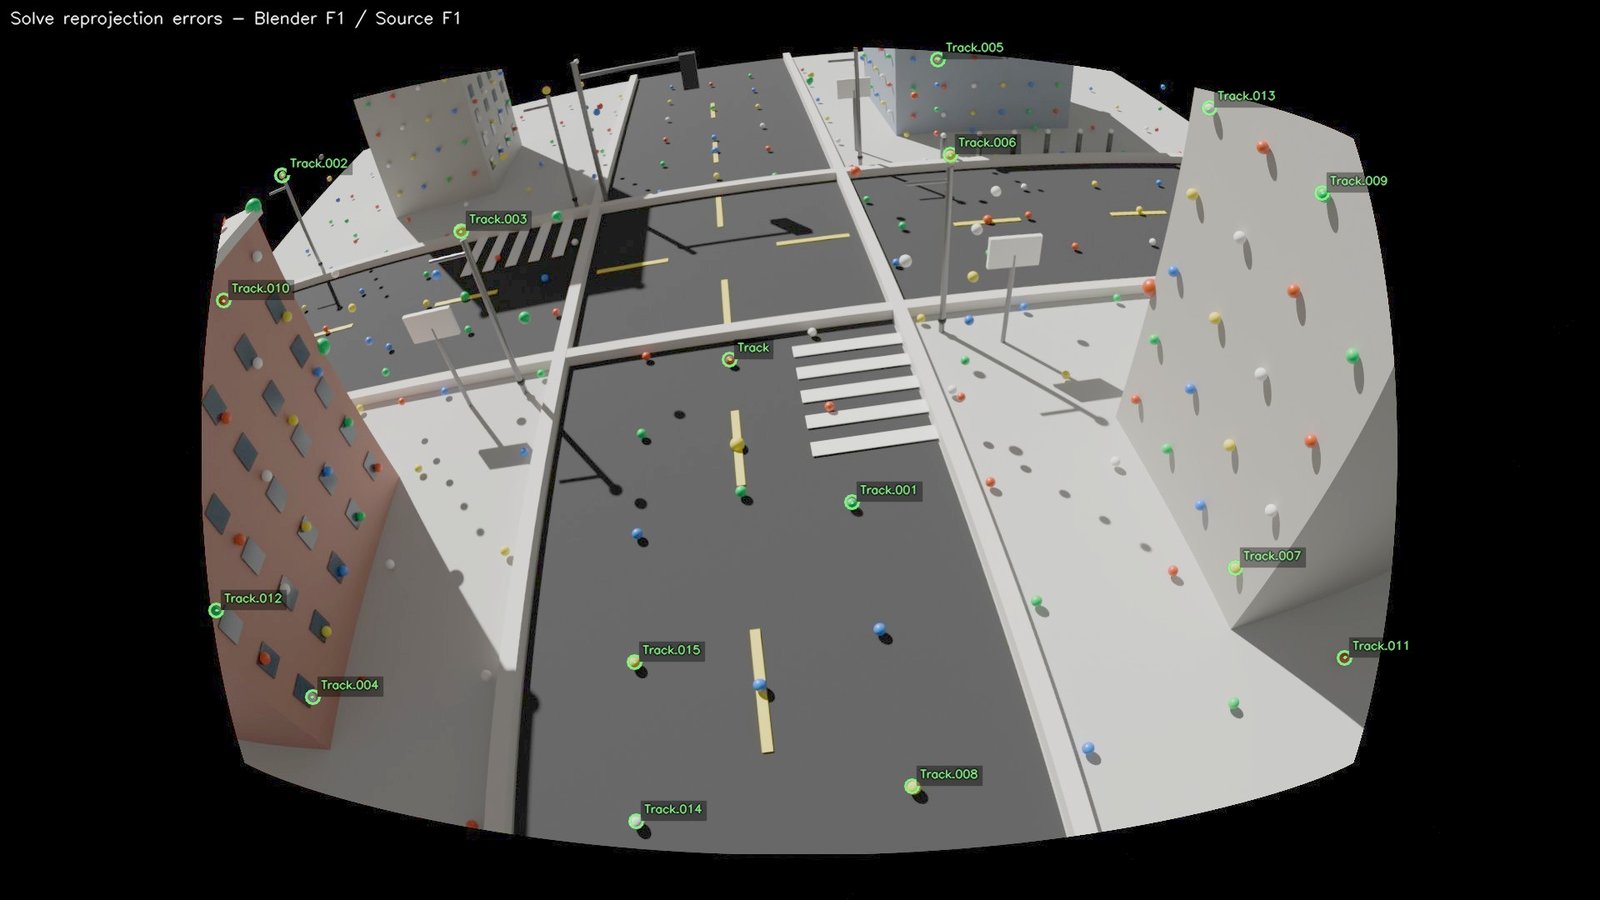
CamMatch™ Professional is a professional camera matching solution developed for accident reconstruction, forensic engineering, and technical visualization. Built as a native Blender add-on and powered by OpenCV, it provides an efficient workflow for camera calibration, camera pose estimation, lens distortion correction, reprojection analysis, and forensic visualization — all inside Blender.
See it in action
Calibration & diagnostics
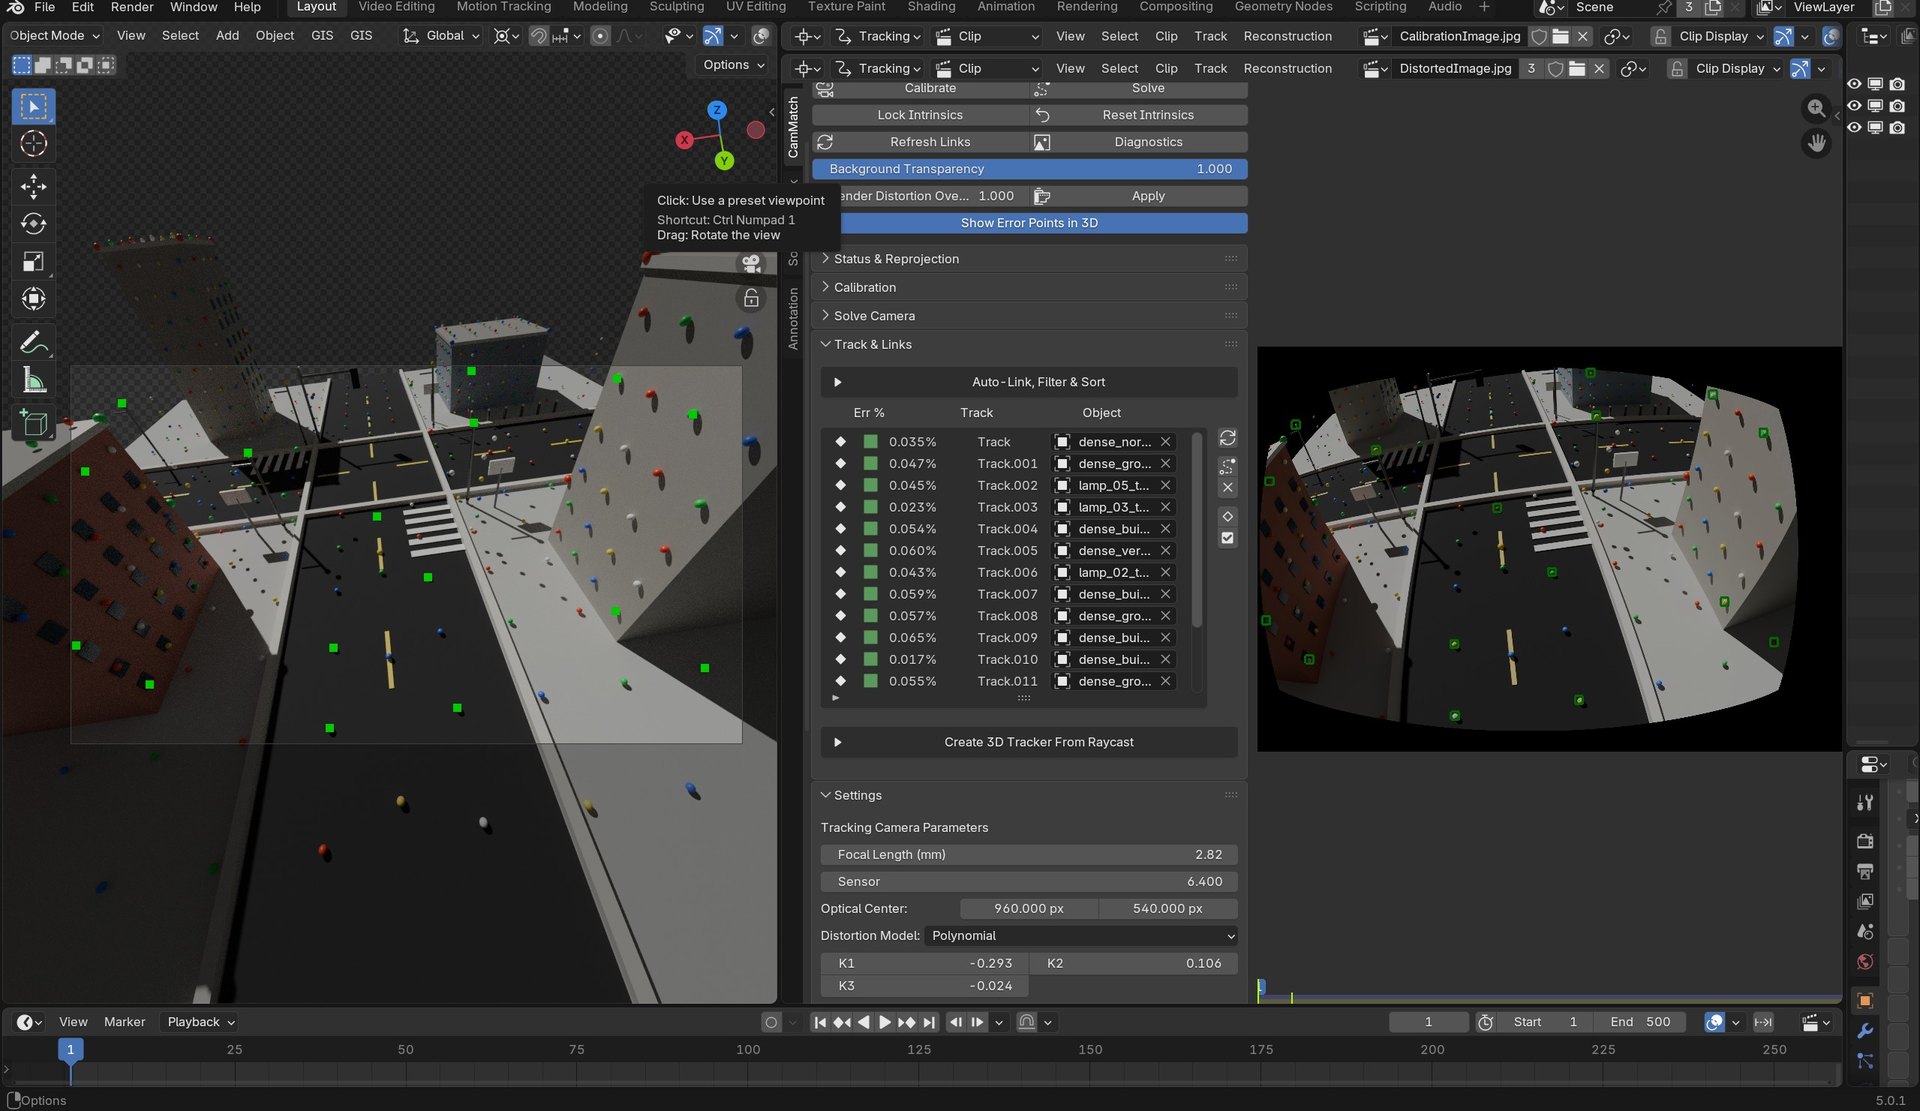
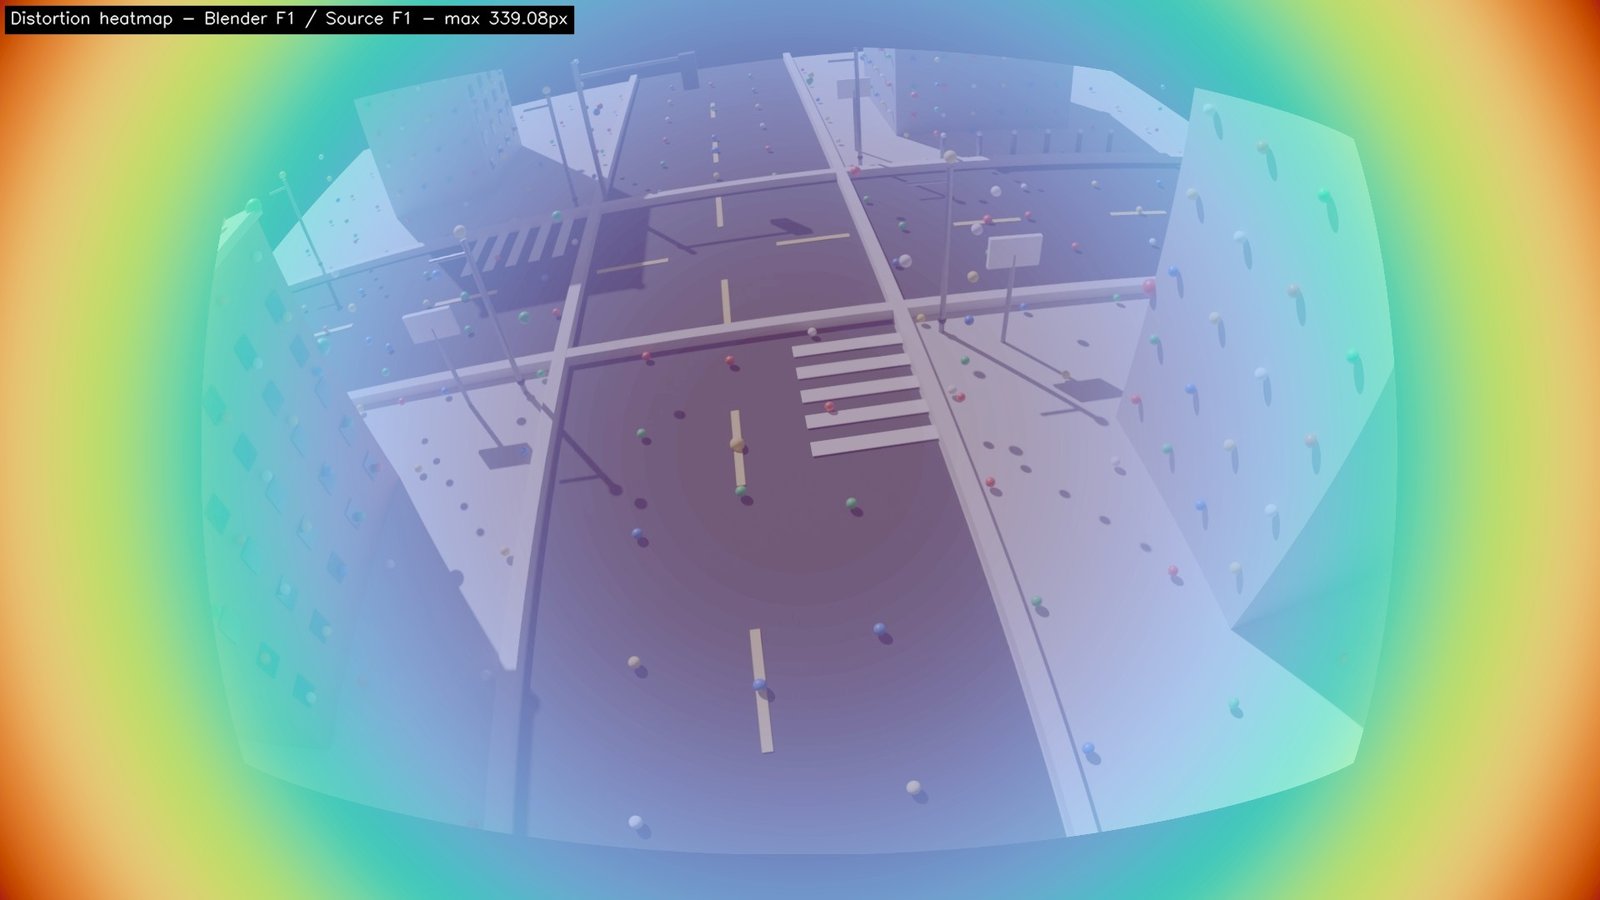
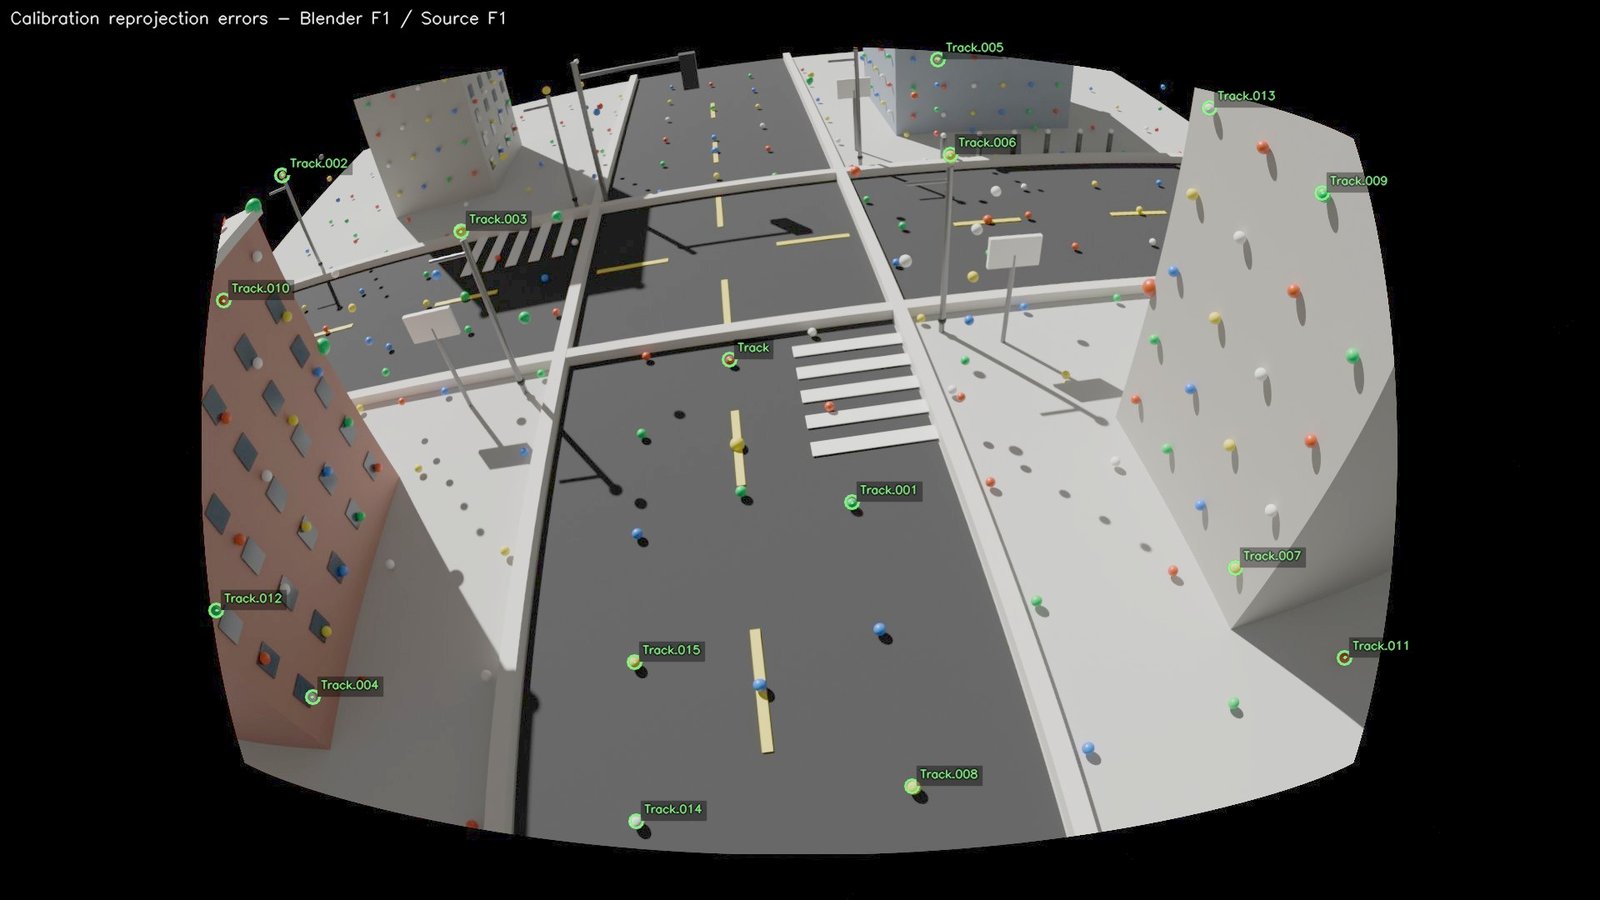
Capabilities
- Native Blender integration
- Camera calibration
- Camera pose estimation
- Lens distortion calibration
- 2D-to-3D object linking
- Multi-frame camera tracking
- Reprojection error analysis
- Diagnostic overlays
- Monte Carlo uncertainty analysis
- Forensic visualization workflows
What’s included
Your purchase provides access to the product’s repository and official update channel for the stated update term. It is not a proprietary software license; the installed add-on remains free software under the GNU GPL.
- GPL software package for CamMatch™ Professional
- One year of authenticated repository access for downloads
- Repository-delivered updates, bug fixes, improvements, and new releases during the access term
- Repository secret associated with the purchaser email
- Official documentation
- Continued use of already-downloaded versions after repository access expires
Professional Certification (offered separately)
The CamMatch™ Professional Certification Program teaches the complete camera matching workflow inside Blender, including 2D image markers, 3D control points, object linking, camera calibration, camera pose solving, reprojection error analysis, diagnostic visualization, and best practices for forensic visualization — live, virtual, and instructor-led, with practice Blender projects and datasets, and an official CamMatch™ Professional Certificate upon successful completion.
Certification sessions are scheduled periodically by Engineering Dynamics Company based on demand, with class sizes intentionally limited for personalized instruction and interactive Q&A. Contact info@edccorp.com for upcoming session dates.
Built for Professionals
CamMatch™ Professional is designed for accident reconstruction engineers, forensic engineers, engineering consultants, government agencies, law enforcement, universities, researchers, and professional visualization specialists.
OpenCV installs automatically
CamMatch uses OpenCV (the cv2 library) for its computer-vision math, but you don't install it separately. On first run, click Install OpenCV in the CamMatch add-on preferences and it sets itself up — from the copy bundled with the add-on, or from the internet if needed — on Windows, macOS, and Linux, and across every Blender Python version, including Blender 5.1 on Python 3.13.
If a machine is offline or behind a strict corporate firewall that blocks the download, the User Guide's Troubleshooting section has a one-line manual install into Blender's own Python. After installing, restart Blender and click Diagnostics in the CamMatch panel.
Requirements
- Blender 5.0 or newer
- OpenCV — installs automatically from the panel on first run (Windows, macOS, and Linux)
Latest version
v2.7.0 · released 2026-09-30 · delivered through the EDC Software repository with automatic update notifications in Blender.
What’s new
Added
- Calibration uncertainty is measured when the calibration runs, the way a solve runs its own pose uncertainty. Left to a button, a freshly calibrated lens was carried into every pose estimate as "calibration assumed exact" until somebody remembered — and since re-calibrating clears the previous measurement, forgetting was silent and understated every figure downstream. Trials sits beside the button and accepts 0 to switch it off.
- Re-estimate This Frame and All N Frames, in the Solve panel under the noise settings. The pose uncertainty was only written by a solve, so changing the noise and regenerating a report moved nothing — which reads as "this setting does nothing", and the remedy it implies is re-solving a file you are happy with. Neither button touches the solve. The panel also names the frames whose stored estimate was made under different settings.
- Use Solved Frames, beside the multi-frame frame list. The frames already solved are recorded on the camera — a pose keyframe is written only by a solve — so re-solving them no longer means reading the numbers off the timeline and typing them back in.
- The position sigma is reported per world axis. One sigma for a camera position is the standard deviation of a *distance*: a non-negative scalar whose spread is narrower than the spread of the position it is measured from, and which says nothing about direction. For a camera looking down a road the direction is the answer. On one frame the distance sigma read 0.3022 m where the axes were 0.41, 0.18 and 0.67 — the figure on the page was 2.2× tighter than the worst direction it described. Older records keep their single column, now labelled "(distance)".
- The breakdown table carries the total, as an *All sources* column beside the parts, and is titled *What the 95th percentile is made of* so it is clear which of the two tables reports which statistic. Without the total, the caveat under that table — that the parts do not add up — could not be checked without scrolling to another table and matching frame numbers by eye.
- The report says how the calibration uncertainty was arrived at: how many perturbed re-calibrations converged out of how many ran, over which frames, and at what noise. A percentage with no account of the run behind it is a number, not a measurement. The per-frame trial count is recorded too, so a report whose sample count changed between solves says so instead of printing the current setting over all of them.
- The pose uncertainty report now says what the uncertainty is made of. It listed the three inputs — tracking noise, 3D point noise, focal uncertainty — and left the reader to work out which of them the answer consisted of.
Each source is now run with the other two switched off, and the result is a table under the main one. On a real eight-point case at 57 ft mean range the camera position P95 was 1.80 ft, and broke down as:
| Source | Camera position P95 | | --- | --- | | Track positions | 0.22 ft | | 3D point positions | 1.40 ft | | Camera calibration | 1.38 ft |
Perfecting the tracking there would have changed the answer by inches. The report names the largest source when it is at least 1.5× the next, and says plainly that no single source dominates when it is not — sending someone to fix the one that is 3% ahead is worse than saying nothing.
It also states that the parts do not sum to the combined figure. They are percentiles of a distance rather than variances, and the inputs interact through the same solve, so a reader who adds them up and finds they do not match is not looking at a mistake.
The extra runs only happen when more than one input is in play, and a breakdown that fails does not lose the solve that was already in hand.
- Measure Focal Uncertainty, beside the Focal % input. Focal % propagates a calibration error into the pose, but somebody had to supply the number, and "how well do you know your focal length" is not a question anyone can answer off the top of their head.
This measures it: the 2D points the calibration was fitted to are perturbed by the same tracking noise the pose estimate assumes, the calibration is re-run, and the spread of the focal is reported as a percentage. The result fills in Focal %, so the two halves join up.
On a single-view calibration over thirty well-spread points it comes out linear in the tracking noise:
| 2D noise | σ_f/f | | --- | --- | | 0.25 px | 0.034% | | 1.00 px | 0.135% | | 2.00 px | 0.271% | | 3.35 px | 0.454% |
At the 3.35 px of a real solve that is past the 0.35% crossover — the calibration, not the tracking, is then the larger source of pose uncertainty. Fewer points make it worse.
A run where nothing converged raises rather than reporting a spread of zero, which would read as a perfect calibration.
- Create 3D Tracker From Raycast moved into the Point Uncertainty panel, above the analysis. It was in Manual Links, which is about pairing clip tracks with objects that already exist; making a point and asking how well it is known are the same piece of work, and the measurement needs a point, so they now sit together in that order.
- Focal-length uncertainty in the pose Monte Carlo, as Focal % beside the 2D and 3D noise inputs.
A calibration error is systematic. Holding the intrinsics fixed across every sample made it invisible — it moves the answer without widening the distribution, so no figure in the report could reflect it and no reader could tell whether it mattered.
Measured before building it, with OpenCV's own reported calibration sigmas: focal length is essentially the whole calibration term (against a focal-only P95 of 0.073 ft at 50 ft, the principal point gave 0.004 ft and the distortion coefficients 0.023 ft), and the camera position P95 from focal uncertainty is about 1.82 × range × (σ_f/f) — linear in both. On the same geometry 3.35 px of tracking noise gives about 0.0063 × range, so:
| σ_f/f | Typical source | Against the tracking term | | --- | --- | --- | | 0.08% | Chequerboard calibration | 0.23× — a rounding error | | 0.35% | — | equal | | 1% | Focal solved from the scene | 2.9× — dominates | | 3% | EXIF, unchecked | 7.8× |
Only the focal is perturbed; the other two together are a few percent of it in quadrature, and an input nobody can answer is worse than one not asked. fx and fy move together, because a focal error is one error rather than an aspect-ratio uncertainty no calibration reports.
The report states which assumption was made either way. Left at 0 it says the calibration was treated as exact and that nothing in the figures reflects it; set, it gives the value and notes when it is past the 0.35% crossover.
- Camera position, alongside the translation vector, in the pose uncertainty.
solvePnPreturnst, the translation of the world-to-camera transform. The camera sits atC = −Rᵀt, and because the rotation moves between Monte Carlo samples as well, the spread inCis a different quantity from the spread int— and it is the one a reader means by "how far from where it is drawn could the camera be".
Measured on synthetic geometry at the 3.35 px noise of a real solve, the camera position's P95 came to 2.0× the translation's at 50 ft, 1.7× at 100 ft and 1.8× at 200 ft. Reports showing only the translation were quoting a number roughly half the size of the one the question asks for.
Both are now reported, position first, with a line stating that they are different quantities. The status line after a run quotes the position.
Fixed
- The calibration uncertainty depended on which frame you were standing on. Two causes, both fixed. It gathered the *current* frame's correspondences and re-ran a single-view calibration — a different and far worse-conditioned problem than the joint multi-frame fit that produced the lens. On a four-view synthetic calibration the single views read 3.10%, 3.72%, 1.30% and 2.28% where the joint fit read 0.72%. And its 2D noise came from the *pose* solve's residuals for whichever frame the timeline was parked on; on one real file those ran from 1.30 px to 8.49 px, a factor of six in the reported figure from nothing but the playhead.
It now measures over the frames the calibration recorded — all of them, jointly, for a multi-frame fit — and takes its noise from the calibration's own residuals, corrected for what that fit spent: the free intrinsics once and six extrinsics per view. Using the pose's six instead understated the noise by a quarter on an eleven-point single-frame calibration.
- A single-frame calibration kept the previous calibration's records. It replaced only its own frame's per-track errors and left every other frame's in place — but a single calibration replaces K and D outright, so those residuals were measured against a lens that no longer existed. The report announced "Calibrated over frames 20, 49" for a calibration run only on 49, and mixed two lenses into one combined RMS.
- Re-estimate All Frames used one frame's errors for every frame. The walk suspends the per-frame error sync handler and nothing else repopulated the errors, so every frame after the first was re-estimated with the starting frame's noise and inlier set. A frame with no stored errors is now skipped and named rather than silently borrowing a neighbour's.
- The point and distance Monte Carlos ran on correspondences the pose was never fitted to. The pose estimate drops what RANSAC rejected and takes its noise from the inliers with the degrees-of-freedom correction; these two did neither. On the solve that surfaced it the two noise figures were 1.71 px and 15.97 px for the same tracking — three rejected points out of twenty-two carrying almost all of the sum of squares. The point estimate was simulating nine times the noise its points actually show.
- The divergence gate did not know about the 3D noise. Perturbing the control points moves the data away from anything one pose can project to, so an honest trial already reprojects at roughly
hypot(2D, 3D-in-pixels)— and the gate, set from the 2D term alone, threw those out as divergent. On synthetic road geometry at 2 px of tracking noise and 0.5 ft of survey noise it rejected 95% of good trials, keeping the ones whose points happened to move least: the most optimistic sample there is. A mirror-flipped pose still reprojects ~1000 px against a gate of 89, so the gate still catches what it is for.
- The contribution runs were not isolated. Each passed only the source it was measuring, so
noise_pxfell to its signature default of 1.0 and the survey and calibration runs each carried a pixel of tracking noise the breakdown says is switched off.
- "Samples: 11 of 1000" was printed as a neutral fact beside figures computed from those eleven. Below half, the row is now an alert that says what was discarded and why — a miss means the ray left the geometry, which points at the target rather than the settings — and the trial count is settable in that panel.
- Reports claimed the calibration was "larger than the tracking as a source of pose uncertainty" from a fixed 0.35% threshold, above a per-frame breakdown that can disagree with it. On one file it was wrong on five of twenty frames for position and on every frame for rotation. Replaced with what the percentage is worth, which is linear in it and true everywhere: about 1.82 × range in camera position at 95%.
- "stored @ 91" beside "Calibrated @ frame 49" read as though the lens lived at frame 91. The snapshot frame is the last frame a pose solve was keyframed at, which on a range solve is just the end of the range.
- Two dead status fields and one duplicated status line.
compare_methods_resultwas written by nothing and read by nothing;uncertainty_resultwas written on every run and drawn nowhere, so the run reported into the info bar and vanished. The point-uncertainty summary no longer restates the panel's table in the shared one-line status, where it arrived truncated and in metres beside a panel showing it in feet.
- Auto Noise understated the tracking noise, so every uncertainty figure came out low. It fed the solve's own RMS reprojection error back in as the 1σ 2D noise — but the pose was *fitted* to those points, and six degrees of freedom went into making those residuals small. Fitted residuals are shrunk, and their RMS underestimates the noise that produced them.
Measured against known noise, 400 synthetic solves per row:
| Points | RMS ÷ true noise | Corrected ÷ true noise | | --- | --- | --- | | 8 | 0.753 | 0.952 | | 10 | 0.814 | 0.973 | | 14 | 0.878 | 0.990 | | 20 | 0.914 | 0.992 | | 40 | 0.960 | 0.998 |
Auto Noise now applies the standard √(N/(N−p)) correction over N = 2 × points residual components and p = 6 pose parameters. On a fourteen-point solve that raises the assumed noise by 12%, and the reported uncertainty with it. Too few points to correct leaves the figure alone rather than dividing by zero.
---
Download CamMatch-*.zip below and install in Blender via Edit > Preferences > Add-ons > Install from Disk. Requires Blender 5.0+.
Install & updates
Your repository secret is delivered instantly — it appears on the confirmation page as soon as you check out (and free products issue one after a quick sign-up). Then, in Blender 5.0 or newer:
- Open Edit → Preferences → Get Extensions.
- Open the Repositories dropdown (top right) →
+ → Add Remote Repository, and paste
https://extensions.edccorp.com/index.json. - Enable "Requires Access Token" on that repository and paste the repository secret you received into the Secret field.
- Your products appear under Available — click Install.
- Make sure the add-on is enabled. Installing usually ticks its checkbox for you, but if the product's sidebar tab doesn't appear, open Edit → Preferences → Add-ons, search for the product, and tick its checkbox to activate it. Updates then arrive automatically.
- Save your preferences so this sticks. Blender normally saves them automatically; if it doesn't, open the ≡ menu at the bottom-left of the Preferences window and choose Save Preferences — otherwise you may have to re-enable the add-on next time you open Blender.
Upgrading from an older, manually-installed version of this add-on? You can disable or remove it anytime from Edit → Preferences → Add-ons — search for it, untick it to disable, or use Remove to uninstall. The new extension replaces it.
Because the installed add-on is GPL-licensed free software, copies you have already received remain yours to use, study, modify, and share under the GPL. When the update term ends, repository access for future official builds and automatic updates may require renewal.